Hardware Setup
DragonFly replaces scattered access control components with a single unified controller — The Box. Three connections and you're done.
The Box
The DragonFly controller consolidates everything into one unit: the relay, the power management, and the connection to DFACS. Fewer components means fewer failure points and simpler diagnostics when something goes wrong.
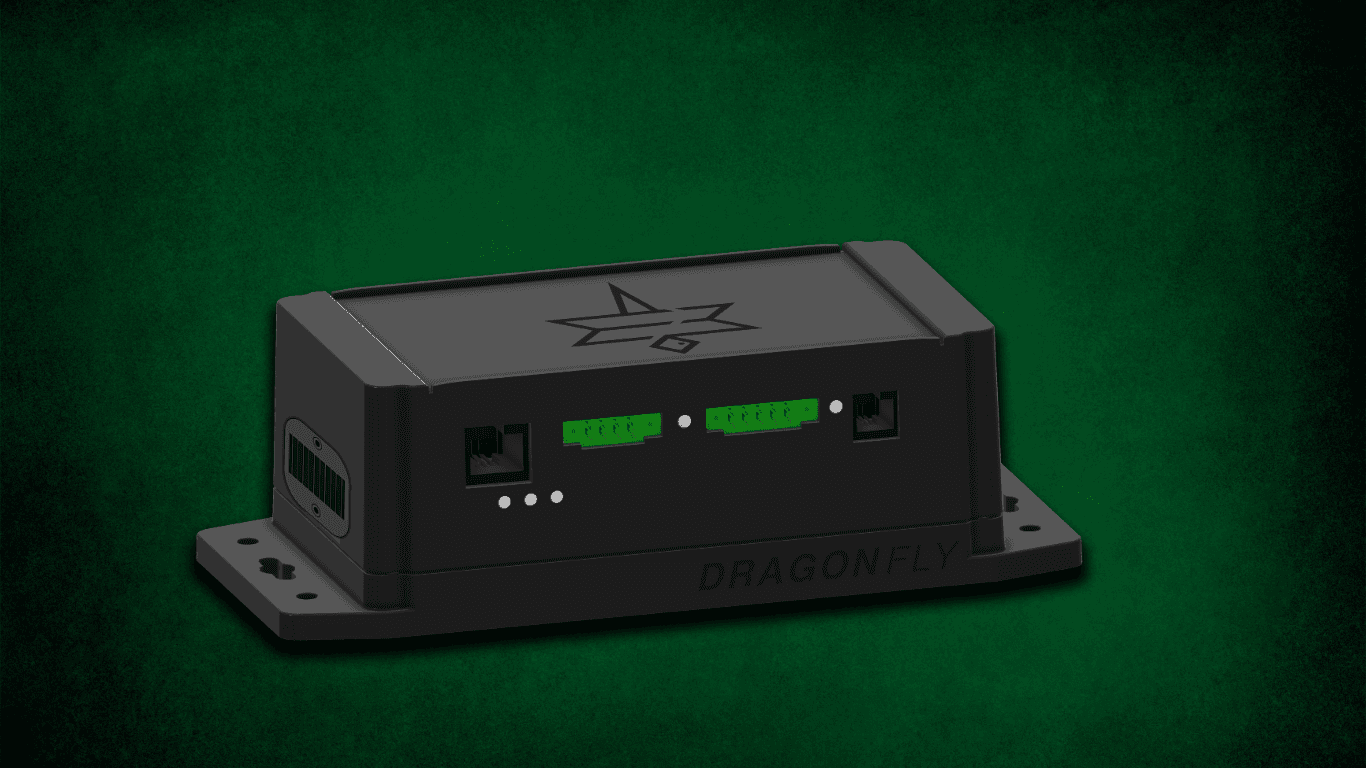
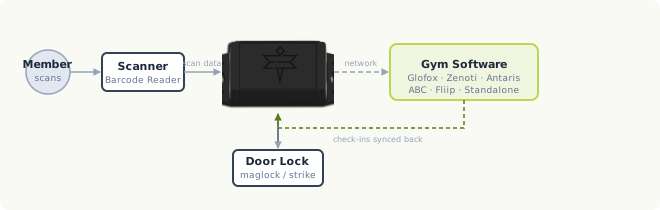
The Box connects to the Barcode Reader via the Orange Reader Cable (RJ22) and communicates over a serial protocol that gives full two-way visibility: lock state, door sensor status, time remaining on an unlock, and RTE sensor events — all in real time. The Box is powered via POE (Power over Ethernet) and connects to your gym software over the network.
Supported Access Methods
| Method | Hardware Required |
|---|---|
| Barcode scan | Barcode Reader (included) |
| Card or key fob | Compatible card/fob reader |
| Facial recognition | Alcatraz Rock AI reader |
Relay Types
Wet Relay (Built into The Box)
The Box includes a built-in wet relay that supplies power directly to the lock:
- Voltage: 12V DC only
- Current: 1.5A maximum
- Covers most maglocks and door strikes — set to wet, The Box powers the lock directly, so the network cable is the only power source needed at the door
- A separate lock power supply is needed for a double maglock (two locks on a double door), or any lock that needs 24V or more than 1.5A
Dry Contact Relay (Client Provided Power Supply)
A dry contact relay switches the circuit only — it does not supply power. The client provides a separate power supply.
- Voltage: 12V or 24V DC (your choice — match your lock's requirements)
- Power supply: provided by client, sized for the lock
- Used for double maglocks, 24V locks, or locks drawing more than 1.5A
Schottky Diode Required
When using a dry contact relay with a maglock, you must install a Schottky diode across the maglock terminals. Maglocks are inductive loads — when power is cut, the coil produces a voltage spike (flyback/back-EMF) that can damage relay contacts and electronics over time. A Schottky diode absorbs this spike. Install it in reverse-bias across the lock terminals (cathode to positive, anode to negative).
ABC Relay
Compatible with ABC Financial access control hardware. Configure relay type as ABC in DFACS.
"Dumb" Relay
A basic relay with no status feedback. DFACS sends open/close signals only — no state confirmation or door sensor support.
- Configure relay type as
Dumb - Manual COM port selection required
Barcode Scanners
Barcode Reader (Included)
The Barcode Reader is included with The Box and connects via the Orange Reader Cable (RJ22). No additional configuration required.
Supported formats: Code 128, Code 39, QR Code, EAN-13, and most standard formats.
RTE Sensors (Optional)
Request-to-Exit sensors detect when someone exits. Used for real-time occupancy tracking.
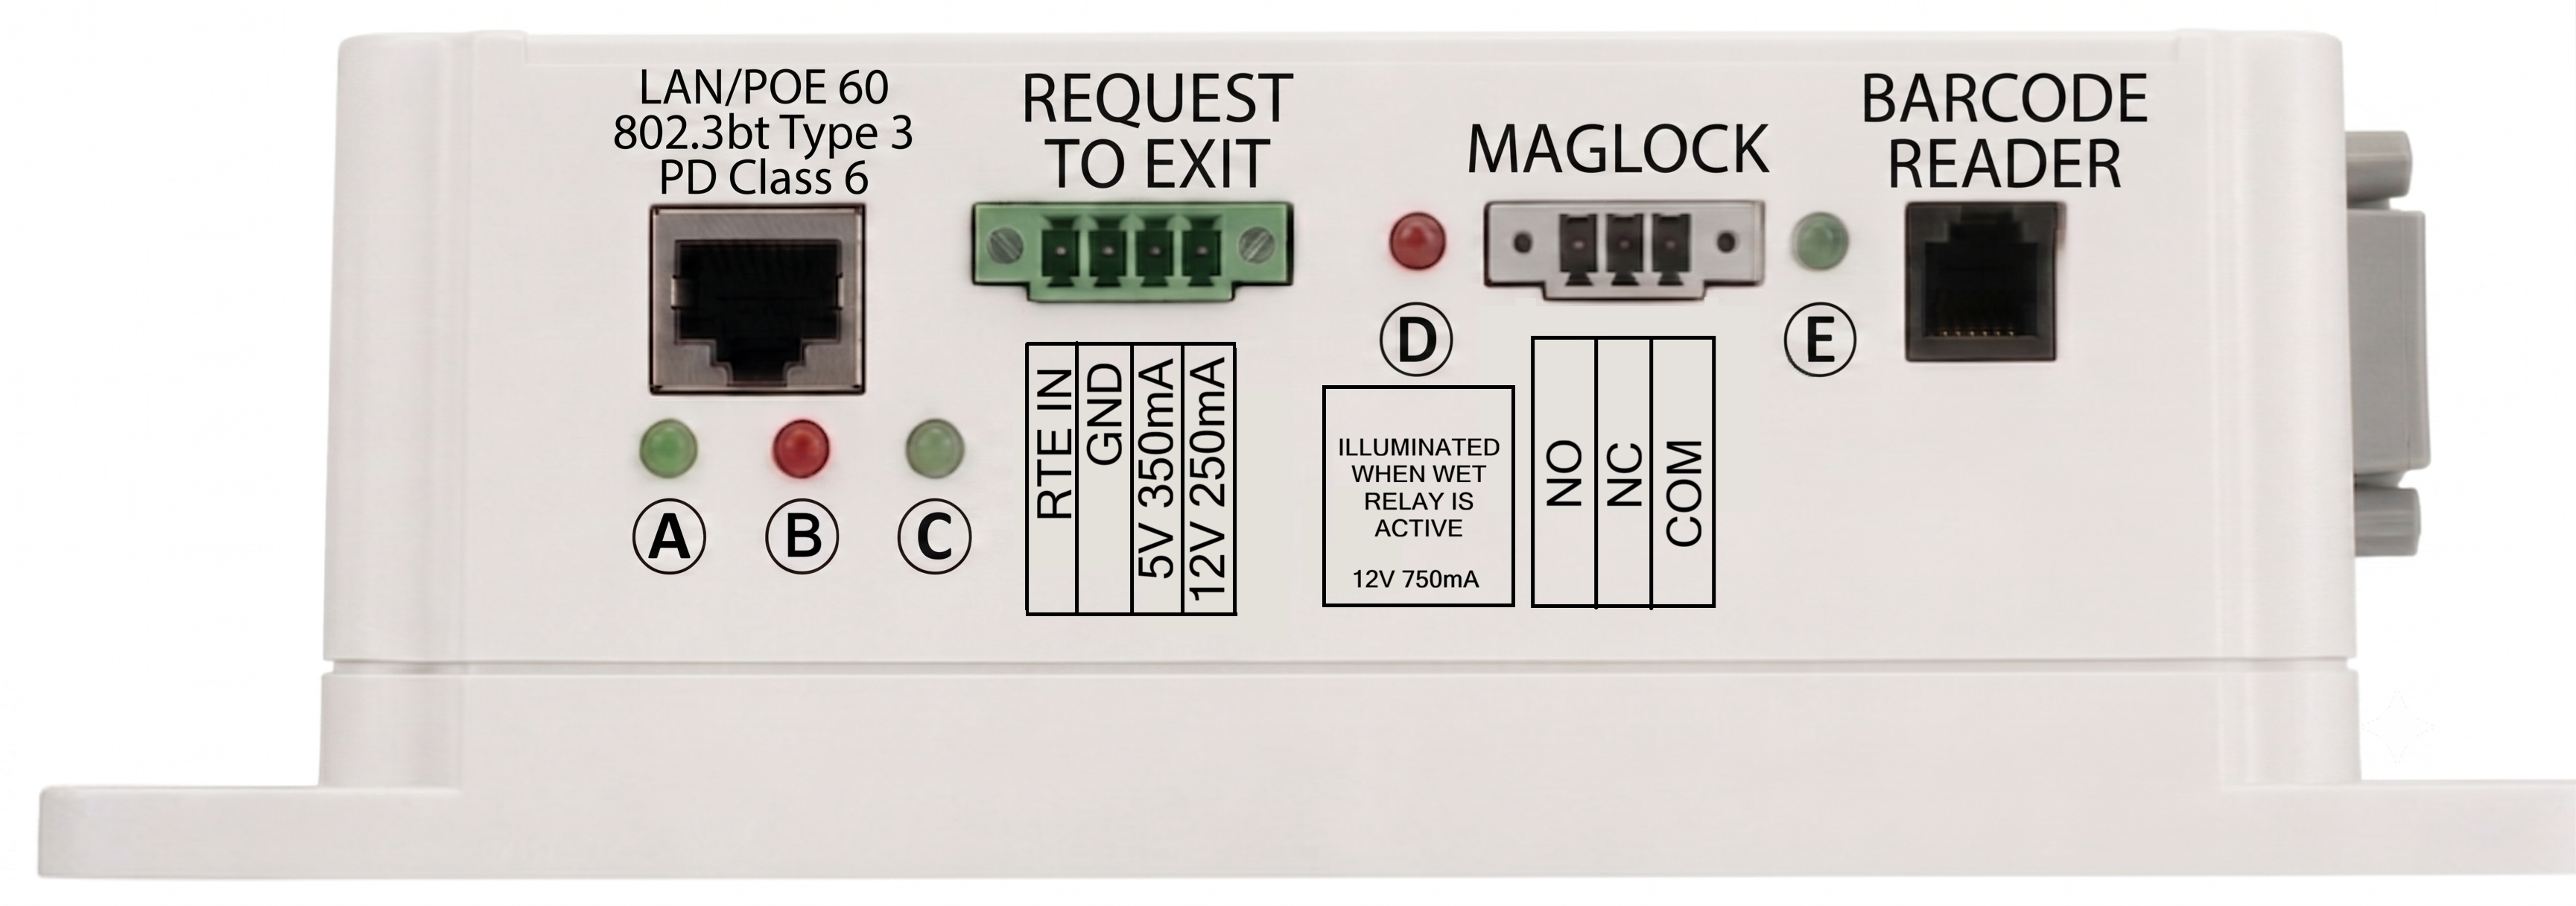
Connect the RTE sensor output to the RTE IN terminal on The Box — located on the green terminal block (marked D on the front panel).
Configuration: Enable RTE Count in Configuration → Hardware and set the RTE mode to match your sensor (NO or NC).
When enabled, DFACS tracks entries and exits and shows a live occupancy count on the dashboard.
Door Position Sensors (Optional)
Detects whether the door is physically open or closed. Useful for propped-door alerts.
Connect to the DPS IN terminal on The Box — located on the same green terminal block (marked D on the front panel).
Configuration: Enable Door Position Sensing in Configuration → Hardware and set DPS mode (NO or NC).
Wiring Reference (DragonFly / The Box)
Wiring by scenario
For per-scenario wiring notes — single/double maglock, wet vs dry relay, mechanical strike, electromechanical crash bar, RTE, DPS, and bond sensors — see Wiring Scenarios.
| Terminal | Connect To |
|---|---|
| NO | Door strike positive (wet relay) or relay switch output (dry) |
| COM | Power supply positive (wet relay) or relay common (dry) |
| GND | Power supply negative and lock negative |
| RTE IN | Request-to-Exit sensor (optional) |
| DPS IN | Door position sensor (optional) |
| Barcode Reader Port | Barcode Reader via Orange Reader Cable (RJ22) |
| LAN/PoE | Ethernet to POE injector |
Lock Type Reference
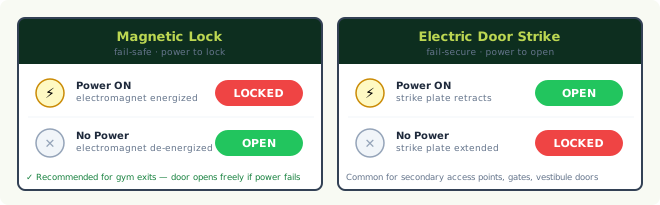
Power Requirements
| Component | Voltage | Current |
|---|---|---|
| Door strike (typical) | 12V DC | 500mA–1A |
| Magnetic lock (typical) | 12V or 24V DC | up to 545mA @ 12V / up to 380mA @ 24V (range varies by model) |
| The Box | POE (802.3bt, 60W) | — |
The wet relay supplies 12V up to 1.5A from The Box, which covers most single maglocks and door strikes. Use a dry contact relay with a separate 12V or 24V power supply for a double maglock, a 24V lock, or any lock drawing more than 1.5A.
Finding COM Ports
If DFACS doesn't auto-detect your hardware:
- On the DFACS device, open Device Manager (right-click Start → Device Manager)
- Expand Ports (COM & LPT)
- Note the COM port for your device (e.g.,
COM3,COM7) - Enter that port in DFACS Configuration
Tip
Unplug one device at a time and watch which entry disappears in Device Manager to identify which port belongs to which device.
Troubleshooting Hardware
Relay doesn't respond:
- Check the COM port setting in Configuration
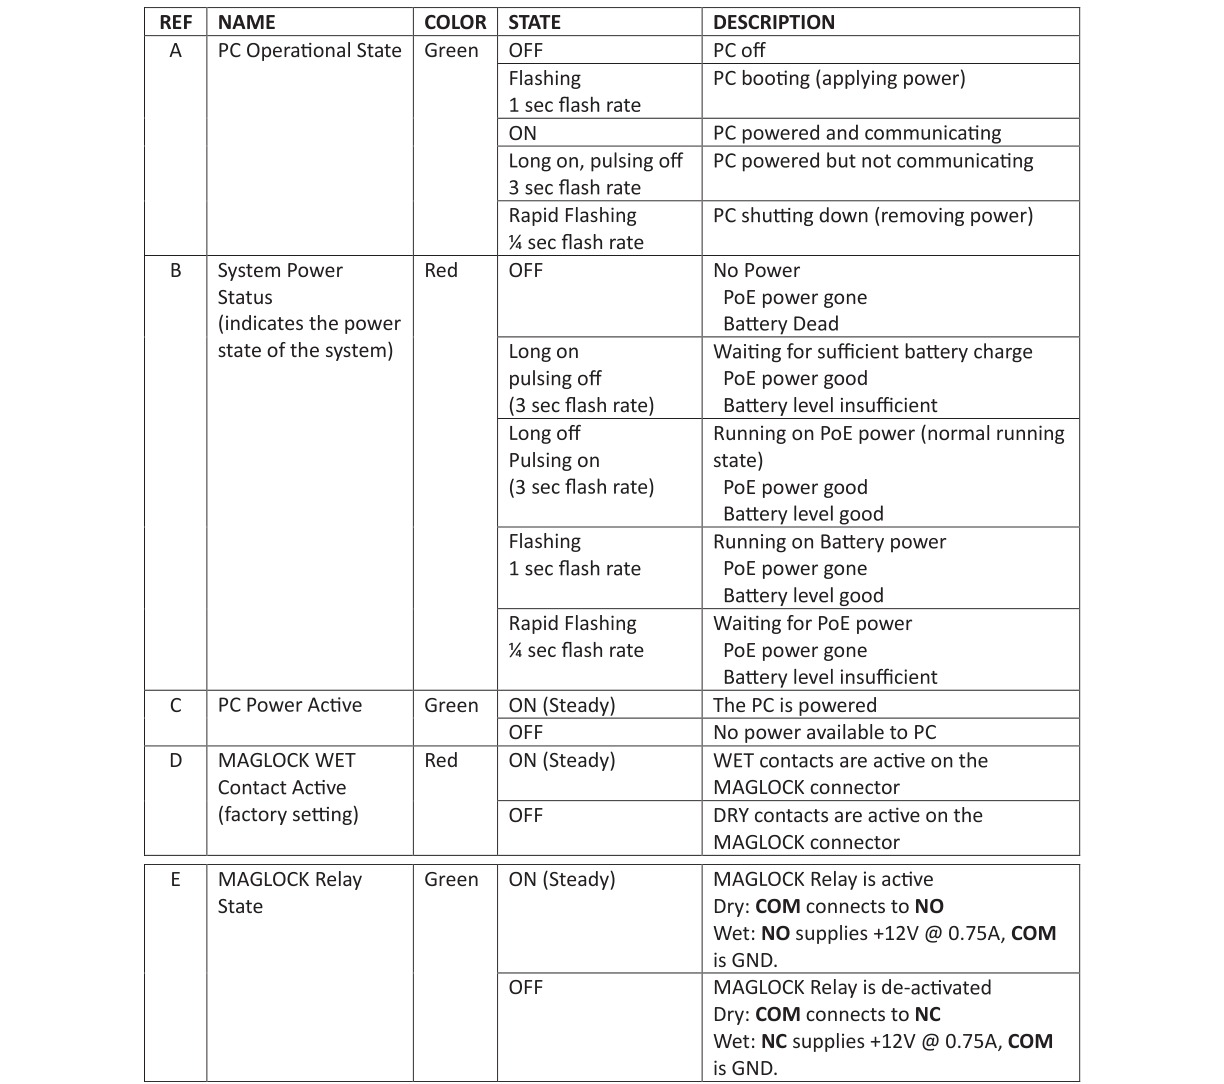
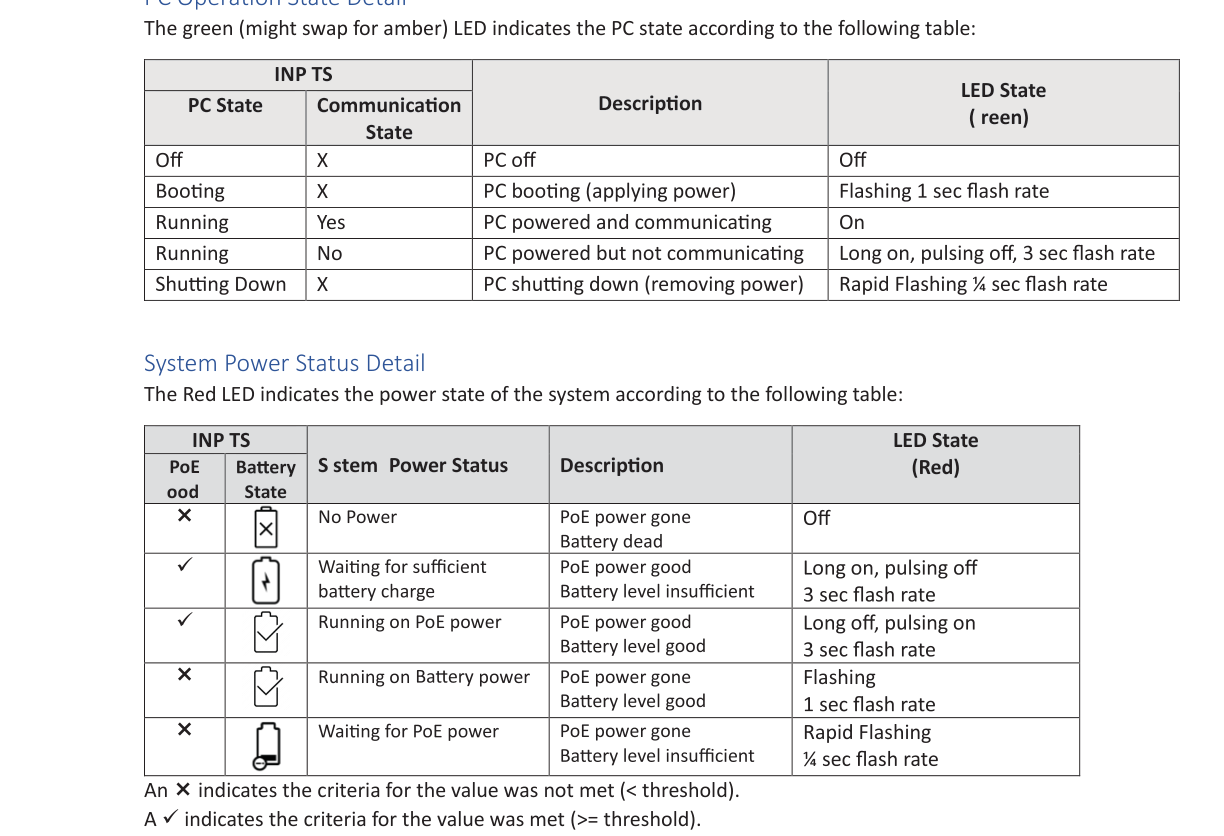
- Confirm The Box LEDs are on (LED B pulsing = normal POE power; LED E = relay state)
- Check ethernet cable connection between The Box and POE injector
- Confirm the controller LED is on
- Check Device Manager for the COM port
Barcode scanner not reading:
- Check the Orange Reader Cable connection at both ends (Barcode Reader and The Box Barcode Reader port)
Door doesn't unlock after a valid scan:
- Confirm relay type matches your hardware
- Test manually: Dashboard → Status → Test Unlock
- Check lock wiring (NO vs NC terminal)
- Verify lock power supply voltage and current
Door position sensor shows wrong state:
- Swap NO/NC setting in Configuration → Hardware